
Threshold beautiful bathrooms
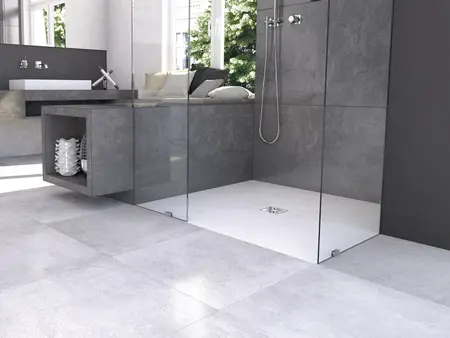
With the flush-to-floor showers of the wedi Fundo series, you can create a barrier-free bathroom that impresses with quality, functionality and an attractive design. Because the modular systems make every bathroom unique – tailored to the floor plan and the wishes of the clients.
Our flush-to-floor showers are durable, waterproof in the system and wheelchair-suitable. Functional, aesthetically pleasing and safe – simply typical wedi.

Tailor-made solutions for flush-to-floor showers
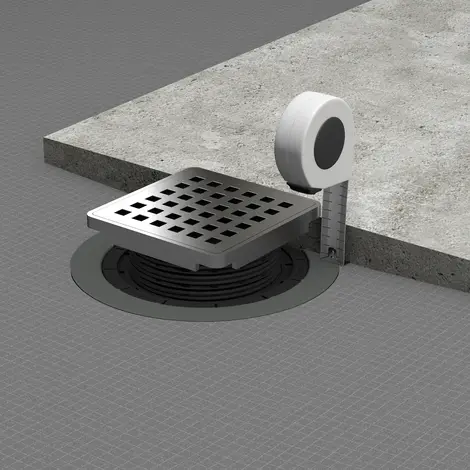
Whether flush-to-floor showers with point or line drainage, whether with a classic shower element or a complete system with factory-integrated drain technology: The enormous variety of wedi Fundo Shower Systems offers the right solution for every construction situation.
In short: They have the right solutions at hand for new construction, bathroom renovation or renovation – for virtually any surface and for tile, slabs or natural stone coverings.
![[Translate to AU-English:]](/fileadmin/_processed_/e/9/csm_wedi_Fundo_Primo_Milieu_USA_68x68_lay3_150dpi_rgb_bfc980ca2f.webp "[Translate to AU-English:]")
![[Translate to AU-English:]](/fileadmin/_processed_/2/3/csm_wedi_Fundo_Riolito_Milieu_USA_lay6_150dpi_rgb_370e0803c2.webp "[Translate to AU-English:]")
Make flush-to-floor showers individual
Colours, forms, structure: At wedi, you can choose from a variety of shower elements and design surfaces for long-lasting and barrier-free showers. You will find all the important information about the various design options on our website. This also includes our seamless design surfaces in natural stone, marble and monochrome optics.
Or take the shortcut to the flush-to-floor shower: With our Shower Configurator. Select the surface and drainage, specify the geometries and define the drain technology, determine the frame and drain position, name the installation situation – finished. After these few steps, you will receive a parts list with prices. What could be easier?

Simply install flush-to-floor showers
Tight schedules, scarce staffing: We know what challenges you face. That's why we place great emphasis on ensuring that you get to your destination quickly and safely, even with flush-to-floor showers.
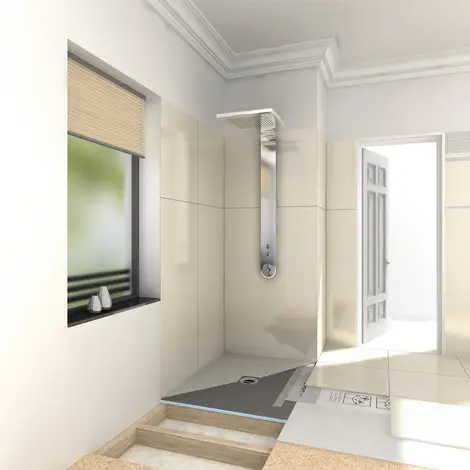
Our flush-to-floor shower systems are based on the well-known wedi building board with the blue core. They are stable and load-bearing, for example under tile coverings. You can easily compensate for unevenness, which is why our solutions are also ideally suited for drywall construction and renovation projects. And of course, the plates are ready to use immediately, and you can start the next step without drying times.

Seal the flush-to-floor shower
Flush-to-floor showers Professional sealing: This is a fundamental component of modern construction planning. They know the devastating damage patterns when water penetrates their destruction.
The shower systems prevent damage to the building fabric and ensure the longevity of the buildings. On the way, we have already thought further and developed smart solutions. The wedi Fundo shower element, for example, is supplied as a complete system, already sealed, with a slope and drain holder.
What if design meets function...
Flush-to-floor showers and barrier-free bathrooms without joints desired? With our seamless design surfaces, we open the way: Whether in natural stone, marble or monochrome optics. This creates a generous spatial effect – and very practical advantages. Because the design surfaces are Low-Maintenance, Hygienic and have no joints that can provide an attack surface for mold.